
Help Getting started
Set up a dedicated server
Five short steps in the dashboard, one at a time. Most people are done in about five minutes.
The five steps
Open the dashboard, sign in with Discord, and choose Set up a new world. When asked what you're connecting, choose Bedrock Dedicated Server.
- Add the bot to a Discord server. Pick one of your Discord servers, approve BedrockRelay on Discord, and you come straight back. It only asks for the permissions it uses: View Channels, Send Messages, Embed Links and Manage Webhooks for the relay, plus Manage Channels, Connect and Move Members for proximity voice.
- Find your Minecraft server. Enter the address players join with, like
play.example.comor203.0.113.5:19135. BedrockRelay pings it, fills in its name, and tells you straight away if players can't reach it. Not running right now? Choose Name it yourself instead. - Install the pack. Stop your Minecraft server, enter your SFTP details and choose Connect and preview. You see exactly what will change before anything is written. More about installing.
- Start your Minecraft server. The page moves on by itself as soon as the pack connects.
- Choose a channel. Chat starts flowing straight away. You can add more channels, and choose what each one hears, afterwards.
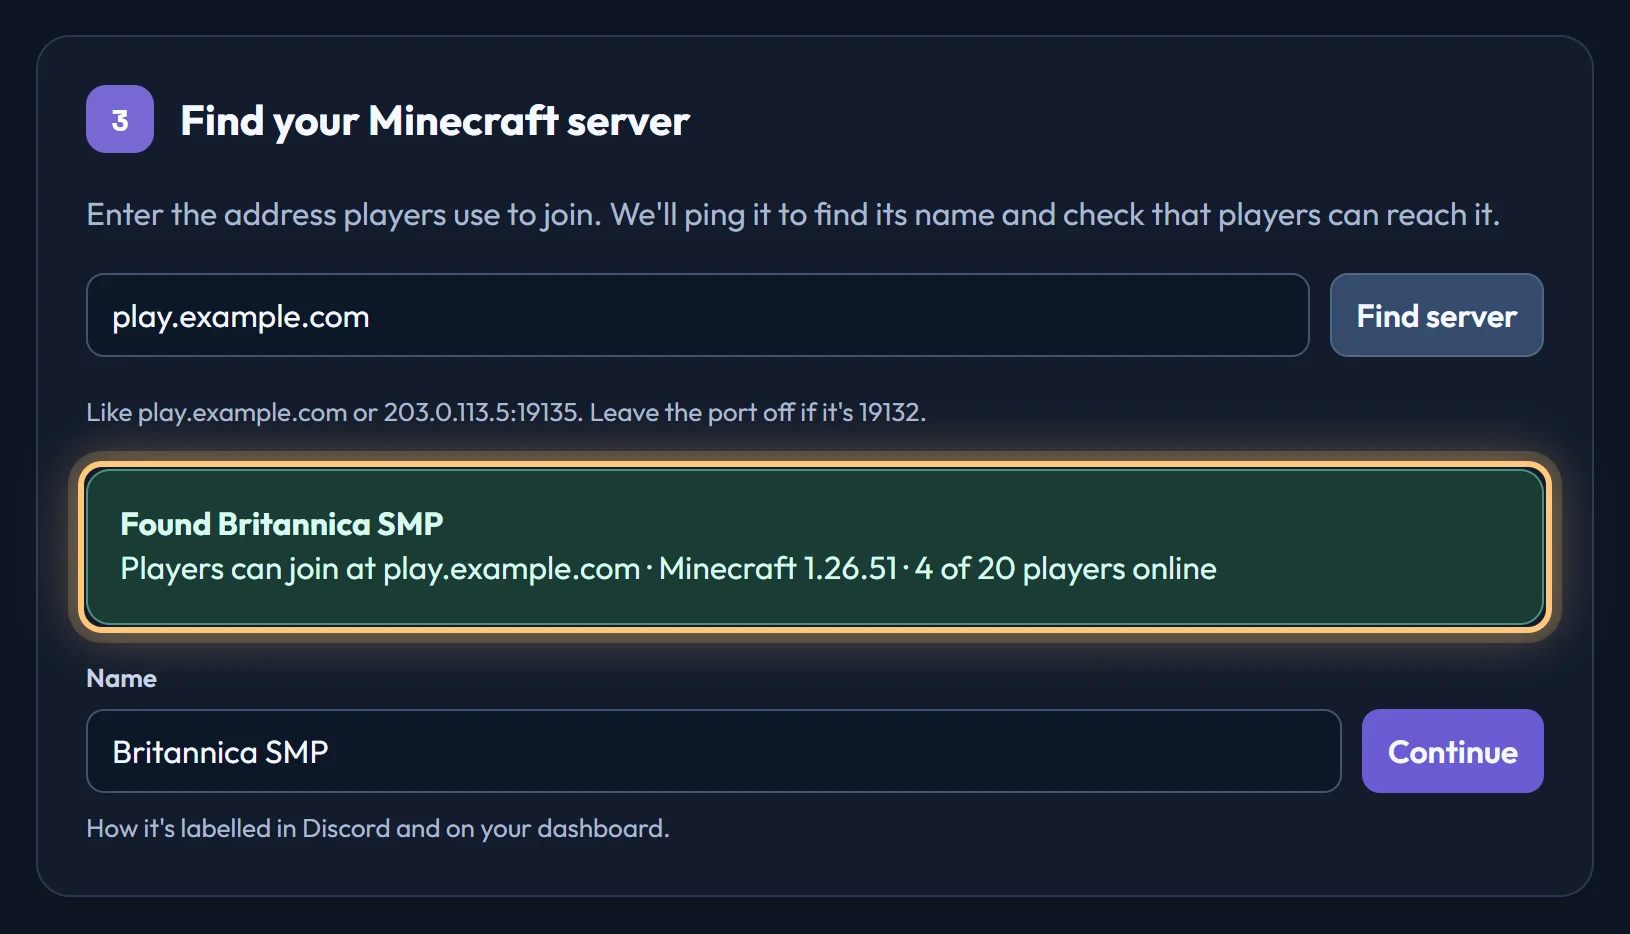
If the address belongs to a Minecraft server you've already set up for another Discord server, you're offered that one instead, so it isn't set up twice.
Leaving setup part way
A server doesn't appear on your dashboard until its pack has connected, or you've chosen a channel for it. If you leave before then, choose Set up a new world again with the same Discord server, and setup offers to Carry on where you left off. A setup that's left unfinished for 30 days is deleted, and a pack downloaded for it stops working.
Installing over SFTP
Your SFTP details are in your host's control panel: a host, port, username and password (or an SSH key), and the folder that holds server.properties and worlds/.
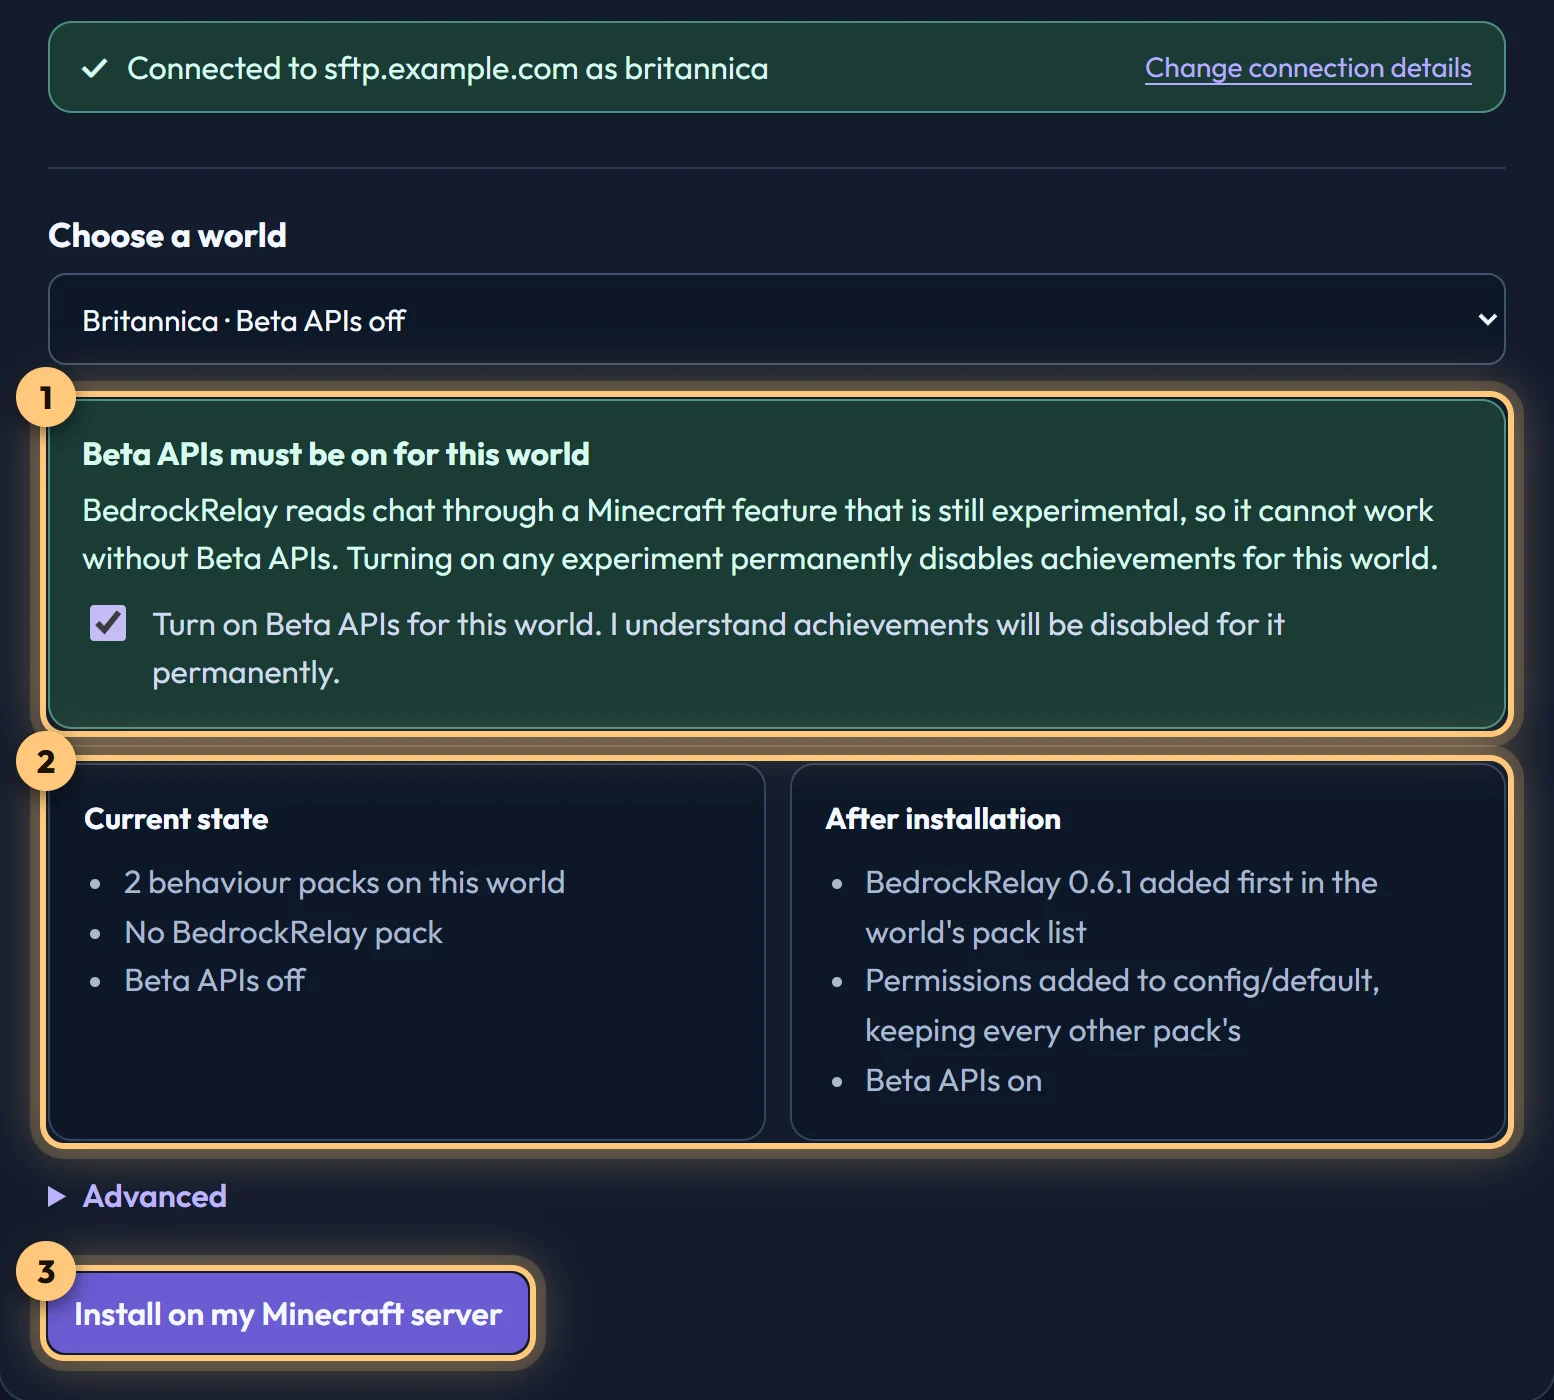
- Choose the world if your server has more than one. BedrockRelay picks the one your server runs.
- Beta APIs must be on for that world. If it's off, tick the box to turn it on, which disables achievements for good.
- Every file we change is backed up first, next to the original. Other packs and their settings are left alone.
- BedrockRelay goes first in the world's behaviour pack list, so chat addons can't hide chat from it. See Joins show in Discord, but chat doesn't.
Your SFTP details are used for that one connection and never stored by BedrockRelay. If you tick Remember these details on this device, your browser keeps the host, port, username and folder, so later SFTP steps fill them in and you only type the password. The password and SSH key are never remembered.
Advanced options
Leave these alone unless your host tells you otherwise:
- My host blocks
@minecraft/server-admin: the pack keeps its settings inside itself instead. - Use a per-module config folder: for VPS and self-hosted servers only. Most managed hosts don't support it.
Installing by hand
If you can't use SFTP, choose Download the pack instead. You get a zip that matches your server's folder layout.
- Stop the Minecraft server.
- Unzip it into the folder that holds
server.properties, merging with what's there rather than replacing it. - Add the BedrockRelay entry from
INSTALL.txtto the top of your world'sworld_behavior_packs.json, keeping the entries already in it below it. - Turn on Beta APIs for the world.
- Start the Minecraft server, and choose I've installed it.
The zip contains your server's token, the key that lets the pack connect, so keep it private. If it leaks, revoke your tokens.
Updating the pack
When a new pack is out, the dashboard says so on the server's card and on its page. Open the server's Settings tab and choose Update pack. It installs the same way as the first time, over SFTP with a preview or as a download, and your channels, settings and plugins stay as they are. Restart the server afterwards.
Reinstall pack, in the same place, puts the current pack back if something has gone wrong with it.
Some features need a newer pack, and the dashboard says when: plugins need v0.3.0, proximity voice v0.5.0, and player details v0.6.0. The newest pack is v0.6.1.
Ready to connect a world, or need to change something?
Open the dashboard